轮播图js代码:网站轮播图的实现,使用JavaScript的完整解决方案
轮播图是现代网站中不可或缺的元素,它不仅能展示多张图片或内容,还能提升用户体验和页面美观度,本文将详细介绍如何使用JavaScript实现一个功能完善的轮播图,并提供完整代码示例。
轮播图的基本结构
实现轮播图首先需要准备HTML结构,通常包括以下部分:
<div class="carousel">
  <div class="carousel-inner">
    <div class="carousel-slide active">
      <img src="image1.jpg" alt="Slide 1">
    </div>
    <div class="carousel-slide">
      <img src="image2.jpg" alt="Slide 2">
    </div>
    <div class="carousel-slide">
      <img src="image3.jpg" alt="Slide 3">
    </div>
  </div>
  <div class="carousel-indicators">
    <span class="indicator active"></span>
    <span class="indicator"></span>
    <span class="indicator"></span>
  </div>
  <button class="carousel-control prev">❮</button>
  <button class="carousel-control next">❯</button>
</div>
CSS样式设计
使用CSS为轮播图添加样式,确保图片正确排列并隐藏非活动项:
.carousel {
  position: relative;
  width: 100%;
  max-width: 800px;
  margin: auto;
}
.carousel-inner {
  position: relative;
  overflow: hidden;
}
.carousel-slide {
  display: none;
  position: absolute;
  width: 100%;
  height: 400px;
  background-size: cover;
  background-position: center;
}
.carousel-slide.active {
  display: block;
}
.carousel-indicators {
  position: absolute;
  bottom: 20px;
  left: 50%;
  transform: translateX(-50%);
  display: flex;
}
.indicator {
  width: 12px;
  height: 12px;
  margin: 0 5px;
  background-color: rgba(255, 255, 255, 0.5);
  border-radius: 50%;
  cursor: pointer;
}
.indicator.active {
  background-color: white;
}
.carousel-control {
  position: absolute;
  top: 50%;
  transform: translateY(-50%);
  background-color: rgba(0, 0, 0, 0.5);
  color: white;
  border: none;
  padding: 15px;
  cursor: pointer;
  font-size: 20px;
}
.carousel-control:hover {
  background-color: rgba(0, 0, 0, 0.8);
}
JavaScript实现逻辑
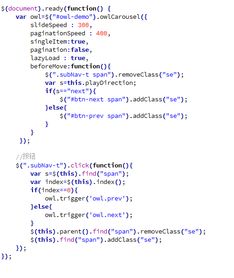
轮播图的核心功能由JavaScript实现,包括自动轮播、手动切换、指示点高亮等:
document.addEventListener('DOMContentLoaded', function() {
  // 获取DOM元素
  const slides = document.querySelectorAll('.carousel-slide');
  const indicators = document.querySelectorAll('.indicator');
  const prevBtn = document.querySelector('.prev');
  const nextBtn = document.querySelector('.next');
  let currentIndex = 0;
  let interval;
  // 初始化轮播图
  function initCarousel() {
    // 隐藏所有幻灯片
    slides.forEach(slide => slide.classList.remove('active'));
    // 重置当前索引
    currentIndex = 0;
    // 高亮第一个指示点
    indicators.forEach((indicator, index) => {
      indicator.classList.toggle('active', index === 0);
    });
    // 显示当前幻灯片
    slides[currentIndex].classList.add('active');
    // 启动自动轮播
    startAutoPlay();
  }
  // 切换到指定索引的幻灯片
  function goToSlide(index) {
    // 确保索引在有效范围内
    if (index < 0) index = slides.length - 1;
    if (index >= slides.length) index = 0;
    // 高亮当前指示点
    indicators.forEach((indicator, i) => {
      indicator.classList.toggle('active', i === index);
    });
    // 切换幻灯片
    slides[currentIndex].classList.remove('active');
    currentIndex = index;
    slides[currentIndex].classList.add('active');
    // 重置自动播放计时器
    clearInterval(interval);
    startAutoPlay();
  }
  // 启动自动轮播
  function startAutoPlay() {
    interval = setInterval(() => {
      goToSlide(currentIndex + 1);
    }, 5000); // 每5秒切换一次
  }
  // 事件监听
  prevBtn.addEventListener('click', () => goToSlide(currentIndex - 1));
  nextBtn.addEventListener('click', () => goToSlide(currentIndex + 1));
  indicators.forEach((indicator, index) => {
    indicator.addEventListener('click', () => goToSlide(index));
  });
  // 初始化轮播图
  initCarousel();
});
增强功能与优化
为了提升用户体验,可以添加以下功能:
暂停自动播放:当用户悬停在轮播图上时暂停自动切换,移开时恢复。
键盘控制:支持使用左右箭头键切换幻灯片。
响应式设计:确保轮播图在不同设备上正常显示。
触摸滑动:为移动设备添加触摸滑动支持。
通过以上步骤,您可以创建一个功能完善的轮播图,JavaScript是实现轮播图交互的核心,通过合理使用事件监听和DOM操作,可以轻松实现自动轮播、手动切换等功能,根据实际需求,您还可以进一步扩展和优化轮播图的功能。
相关文章:
文章已关闭评论!

